I got introduced to Vietnamese cuisine when I lived in Houston. There’s every sort of variety of restaurant there: Cuban, Vietnamese, Mexican, Ecuadorean, Ethiopian, Egyptian, Moroccan, etc. Man, if you can’t find a restaurant in Houston that serves what you like, you ain’t hungry.
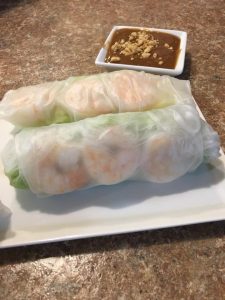 I particularly like the fresh spring rolls. It’s clean eating, filling, good for you, and delicious! I’ll admit that it’s a good break from all the rich Cajun food that flows in this house!
The ingredients aren’t terribly hard to find. I found hoisin sauce and rice paper for the rolls at Walmart, believe it or not. Both of these are in the Asian food section. Albertson’s has the rice vermicelli (also in the Asian food section). Other than that, it’s lettuce, shrimp, peanut butter, oil, and minced garlic.
Starting with the shrimp, I buy shrimp already deveined, but uncooked. You can buy it frozen–ain’t no judging goin’ on here. Don’t get anything larger than the “extra large” size, which is 26-30 count per pound. Anything larger, and you run the risk of ripping the rice paper because the shrimp are so large. Also, don’t get anything smaller than medium shrimp. Salad shrimp ain’t gonna cut it. You’d have to pile it on so much it would make it impossible to properly roll.
Defrost the shrimp if you bought it frozen. Get a pot of lightly salted water boiling, with enough water to cover the shrimp. Once the water is at a rolling boil, add the shrimp and boil for 3-4 minutes max. Don’t overcook the shrimp. There’s nothing sadder than overcooked shrimp except overcooked crawfish. Just cook it until the middle of the shrimp isn’t translucent any more. Drain and run cool water over the shrimp to stop them from cooking any longer. A lot of cooks will tell you to slice the shrimp in half along the body to that it lies flat to make it easier to roll. That reduces the amount of shrimp in my damn roll, and I don’t need that kind of negativity in my life. Get the F outta here with that half-shrimp shit.
The rice vermicelli is cooked similar to spaghetti. While it may say “3 minutes” on the package, boil it a couple of minutes longer. Ain’t no such thing as “al dente” rice vermicelli, and you ain’t cookin’ at Alesi’s Pizza House in Lafayette. Boil that shit until it’s tender, ya hear? Drain and run under cool water to stop it from cooking.
Try to use only the green parts of the lettuce–discard the hard white parts. They are bitter and hard to roll and would make Mother Theresa cuss like a sailor when they’re ripping your rice paper apart while you’re trying to roll. It helps to sorta chop it up too, but not too fine. Shredded lettuce makes a mess when you’re eating it in a spring roll.
Some people like to add pork–I do not. However, if you MUST add pork also, get about 1/2 pound of pork roast and get it as lean as you can manage. Cover the roast with water in a pot and add a teaspoon of salt and a teaspoon of sugar. Cook on medium heat for about 30 minutes. It’ll float when it’s done and there’s absolutely no pink in the middle. Slice it thin, and I mean as thin as you can get it without slicing off the pads of your fingers.
Once you have all your ingredients assembled, it’s time to roll. Add some warm water to a plate so you can dip a sheet of rice paper in it. Leave it in there about 20 seconds–just enough to make it pliable. Lay it down on a DRY surface. I use a cutting board. Lay a bit of lettuce down first followed by about 1/4 handful of cooked rice vermicelli. From the bottom, roll the rice paper around the lettuce and vermicelli, tightening as you are rolling. Add three or four shrimp at the edge of that first rolling. Fold in the sides, taking care not to use so much force that it rips the rice paper. Continue rolling up so that the shrimp are only covered by one wrapping. Don’t worry about the flap–it self closes. No need for cutesy food grade fasteners or toothpicks. The more often you make this stuff, the easier rolling will become. Like I tell my pistol students, practice makes perfect, except that making these rolls perfectly probably won’t save your life.
For the peanut sauce, saute two tablespoons of minced garlic in two tablespoons of vegetable oil until you can smell the garlic pretty well. Add two or three tablespoons of peanut butter, eight tablespoons of hoisin sauce and one cup of water. Heat until boiling, whisking it as it cooks. Once boiling, turn off the heat. Serve immediately. You can refrigerate this stuff, but personally, I reheat it before I eat it. If desired, you can add a dash of crushed peanuts to your sauce bowl. I just get a handful of dry roasted salted peanuts (even the cheap Walmart brand works) into a Ziploc bag and beat the crap out of it with my tapered French rolling pin. Sometimes I wonder if my husband thinks I’m just taking out my frustration on the peanuts.
Watch my short video on how to roll these things here.
 Phytohemagglutinin! Sounds like something an ancient Viking would scream before chopping your head off, doesn’t it? Don’t know that word? It’s alright. Hardly anybody does. But you should at least know what it can do to you. Phytohemagglutinin (PHA) is a toxic chemical produced by plants in their seeds that act as natural pest control. It prevents bugs from destroying seeds (i.e. beans.) Different types of dry beans contain different levels of this toxin, and dry red kidney beans have some of the highest levels of it. Toxins in muh beans, you say? Pish posh. Um, nope. There’s a reason why dry beans sometimes cause loads of gastric distress. This is it. PHA attacks the epithelial lining of the intestines. The body, recognizing the toxin, attempts to flush your lower half out, and sometimes your upper half, resulting in diarrhea and vomiting.
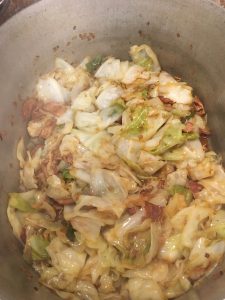
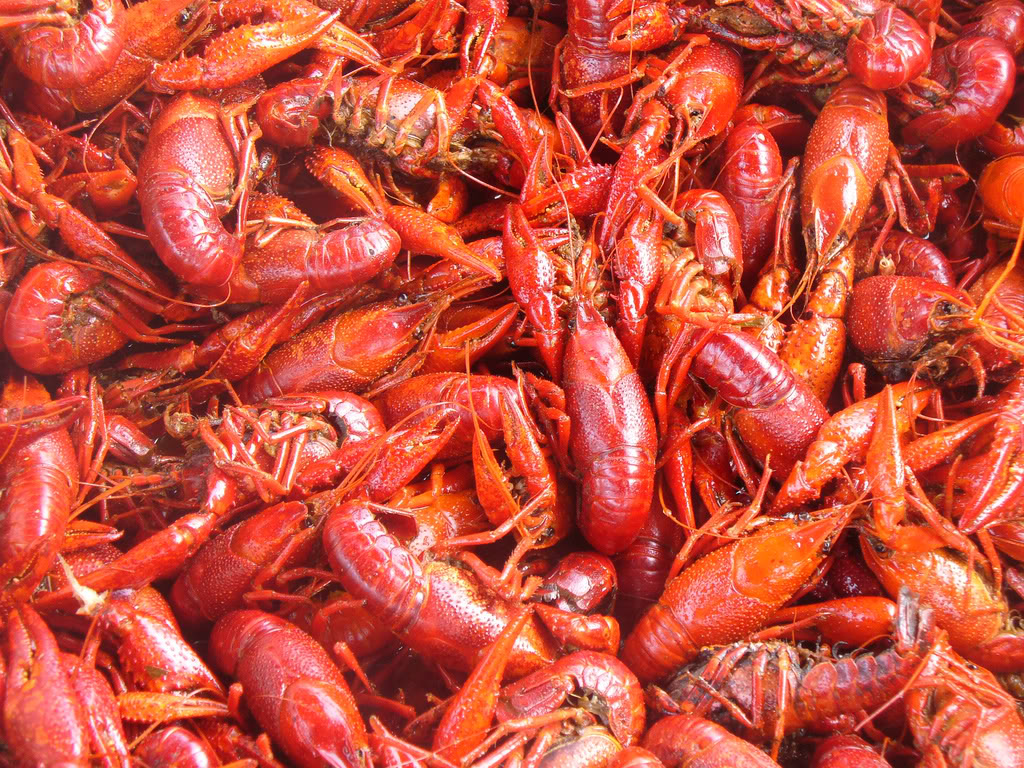
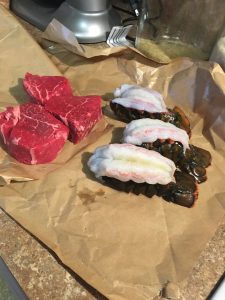 Just a quick post on this New Year’s Eve. I just made a wonderful dinner for myself and my family. Lili and I went to Albertson’s intending on getting a filet mignon steak for each of us to pair with a baked potato for our New Year’s Eve dinner. While kind of browsing the butcher block, Lili spotted lobster tails on sale for $5 a piece. I thought “Man, surf and turf tonight would be awesome!” After consulting with her (because you know, she’s the boss), we decided to get each of us a lobster tail also. She wasn’t crazy about the steak (she’s still forming her palate), but the lobster tail disappeared off her plate. She’s a lobster monster. Lawday, she must think they’re crawfish on steroids. But they are not. The meat isn’t as sweet as crawfish, but still greatly enjoyable nonetheless. And they’re easier to cook than you think.
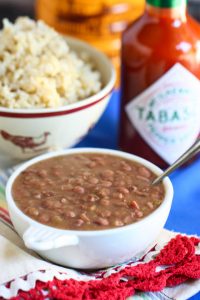
 making blackeyed peas for New Year’s Day in my smothered cabbage post, so I’m making good on it today. Making blackeyed peas is simple. The more crap you put in it, the more questionable the taste. The only meat I put in mine is either salted pork or pickled pork, but if you use pickled pork, make sure you rinse it well before cutting it up and putting it in your blackeyes. I learned a hard lesson when I lived in Independence, LA. I cooked a whole mess of blackeyed peas using pickled pork and never rinsed the excess pickling stuff off of the pork before putting it in the pot. Well, my intestines didn’t take too kindly to the onslaught of vinegar/citric acid and they took their revenge the next day. I was on my way back home to Independence from Baton Rouge on I-12. We all had to exit the interstate because some genius hauling rocket fuel wrecked and spilled it all the way across the interstate. So, the masses, including me, pass on highway 190 through all these tiny charming little towns with the local police directing traffic (because redirecting traffic from I-12 to 190 is like shoving a watermelon through a straw). Well, that made for a LONG trip home and by the time I got to Albany, my intestines had built up a good bit of gas. I don’t need to tell you folks about the laws of physics. They basically work the same in space as they do in your abdomen. More room out than in. And out it started coming. I was the sole occupant of my truck, so my friends and family can thank heaven for that. Now, normally, I enjoy bathroom humor. Fart jokes, etc. crack me up. Folks, I am here to tell you that this flatulence was no laughing matter. The odorous emissions that were coming out of me curled my nose hairs. I couldn’t even stand my own brand. It was astounding. I had to roll my windows down and hope that the noxious fumes didn’t knock out the poor town cops that were directing traffic as I passed by. By the time I got home, I kept the windows rolled down just to air out the cab of the truck. I have rinsed my pickled pork ever since, and I suggest you do the same. Normally, I have an iron constitution and I’m not very susceptible to the cliché stomach ailments, but this threw me for a loop. I can laugh about it now (and so can you), but back then, I was NOT amused.